Install MinIO KMS on Linux
MinIO KMS is licensed under the MinIO Software License.
MinIO Key Management Service (KMS) supports installation on Linux hosts running AMD64 or ARM64 architectures.
This procedure downloads and installs MinIO KMS onto a single host machine. You can then expand the cluster with additional nodes to increase availability and resiliency. For production environments, ensure a minimum of 3 MinIO KMS hosts.
Procedure
The commands in this procedure may require sudo permissions to succeed depending on the level of access you have when accessing the host machine.
If you do not have sudo or similar permissions, contact your systems administrator for assistance with completing the steps in this procedure.
-
Create a MinIO KMS system user and group
This procedure uses a Linux/Unix system-level user and group for normal operations. Create the user and group with the following commands:
sudo groupadd -r minkms-user sudo useradd -M -r -g minkms-user minkms-user -
Create a directory structure for KMS files and configurations
The following commands create the files and directories that support running the KMS.
sudo mkdir -p /etc/minkms/certs/CAs /mnt/minio-kms
sudo touch /etc/default/minkms
The commands create the following structure:
/etc/minkms
  /certs             # Directory for TLS certificates
    /CAs             # CA certificates for remote systems MinIO KMS connects to
/mnt/minio-kms       # Dedicated mounted volume for KMS data
/etc/default/minkms  # Environment variables for MinKMS process
Use
chownandchmodto restrict access to these paths to theminkms-useruser:sudo chown -R minkms-user:minkms-user /etc/minkms sudo find /etc/minkms -type d -exec chmod 700 {} + sudo find /etc/minkms -type f -exec chmod 600 {} + sudo chown -R minkms-user:minkms-user /mnt/minio-kms sudo chmod 700 /mnt/minio-kms sudo chown minkms-user:minkms-user /etc/default/minkms sudo chmod 600 /etc/default/minkmsSet directory and file permissions separatelyDirectories need the execute bit for their owner and files do not, so apply the two modes with separate commands.
A single recursive command such as
chmod -R 660 /etc/minkmsstrips the execute bit from every directory below/etc/minkms. MinIO KMS can then read neither its configuration file nor its certificates, and the service fails to start. -
Download your SUBNET license key
License requirement droppedStarting withRELEASE.2025-11-12T19-14-51Z, MinIO KMS no longer requires a license key to start up. This step remains in place for supporting installations from older versions of the binary.Log into MinIO SUBNET and access your License Key. From the Deployment view, select License to view the key.
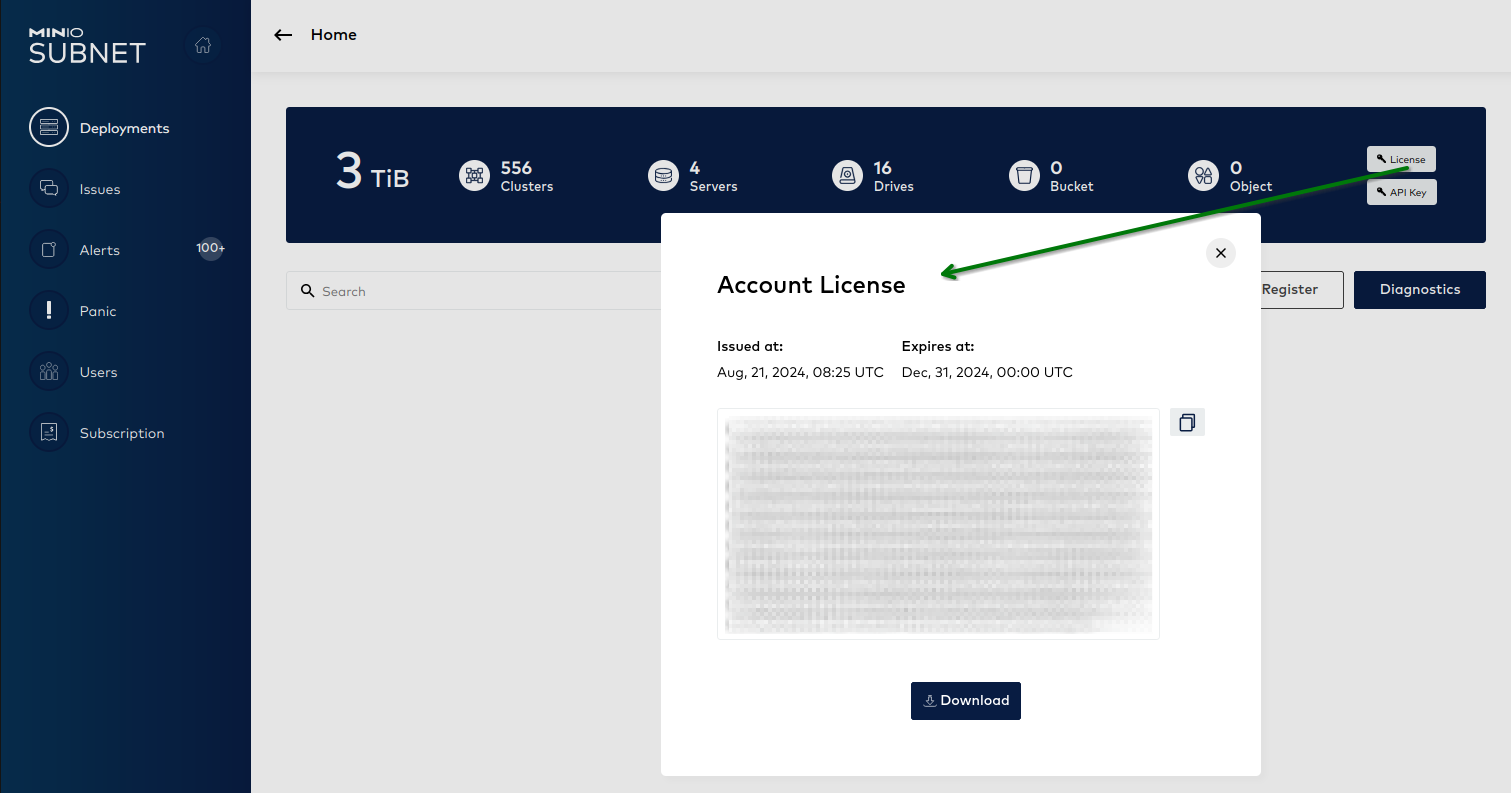
Download the file to
/etc/minkms/minio.license, then give it to theminkms-useruser:sudo chown minkms-user:minkms-user /etc/minkms/minio.license sudo chmod 600 /etc/minkms/minio.licenseThe license file arrives with the ownership and permissions of the account that downloaded it, not the ones applied to
/etc/minkmswhen that directory was created. -
Download the MinIO KMS binary
Select the tab corresponding to your OS/Architecture combination. The displayed commands download the latest KMS binary, set it to executable, and move it into the system path at
/usr/local/bin.You can validate the installation by running
minkms help. -
Add the TLS certificates and Certificate Authorities
Place the TLS private key
private.keyand public certificatepublic.crtin the/etc/minkms/certsdirectory. For how to obtain those files, including generating self-signed certificates for a test deployment, see Certificate Management. Give the certificate files owner-only read and write access, and leave the directories traversable by their owner:sudo chown -R minkms-user:minkms-user /etc/minkms/certs sudo find /etc/minkms/certs -type d -exec chmod 700 {} + sudo find /etc/minkms/certs -type f -exec chmod 600 {} +Run both commands again whenever you add or replace a file in
/etc/minkms/certs. A new file arrives with the default permissions of the account that created it, not the permissions you set earlier.The
/etc/minkms/certs/CAsdirectory holds CA certificates that MinIO KMS uses to validate the TLS certificates of remote systems it connects to, such as an external HSM provider or another MinIO KMS node. Most single-host installations do not need it. If you do use it, include the root and all intermediate certificates needed to validate the chain.AIStor Object Store does not need a CA hereAIStor Object Store authenticates to MinIO KMS with mutual TLS, presenting a client certificate that it derives from its API key. MinIO KMS identifies the caller from the public key in that certificate and does not validate it against a Certificate Authority, so there is no object store CA to add to
/etc/minkms/certs/CAs.The object store must still trust the MinIO KMS server certificate. Configure that trust on the object store hosts.
-
Create a service file for MinIO KMS
Create a new
minkms.servicefile at/usr/lib/systemd/system/minkms.servicewith the following content:[Unit] Description=MinKMS Documentation=https://docs.min.io/kms Wants=network-online.target After=network-online.target AssertFileIsExecutable=/usr/local/bin/minkms [Service] WorkingDirectory=/usr/local User=minkms-user Group=minkms-user ProtectProc=invisible EnvironmentFile=-/etc/default/minkms ExecStart=/usr/local/bin/minkms server $MINIO_KMS_VOLUME $MINIO_KMS_OPTS # Let systemd restart this service always Restart=always # Specifies the maximum file descriptor number that can be opened by this process LimitNOFILE=65536 # Specifies the maximum number of threads this process can create TasksMax=infinity # Disable timeout logic and wait until process is stopped TimeoutStopSec=infinity SendSIGKILL=no [Install] WantedBy=multi-user.target -
Generate an HSM Key
MinIO KMS uses a hardware/software security module (HSM) for encrypting and decrypting the keystore and for authenticating internode calls. All KMS nodes must use the same HSM configuration while part of the same cluster.
Generate an HSM key by using the following command:
minkms --soft-hsmMinIO KMS uses an NIST.SP.800-108r1-compliant algorithm for generating a software-based HSM for use as the REK.
Store the returned value in a secure location, such as a dedicated secrets vault.
-
Build an environment file for MinIO KMS
Open the file at
/etc/default/minkmsand enter the following content:MINIO_KMS_HSM_KEY=hsm:aes256:KEYVALUE MINIO_KMS_VOLUME=/mnt/minio-kms MINIO_KMS_OPTS="--config /etc/minkms/config.yaml"Replace the
MINIO_KMS_HSM_KEYwith the value generated in the previous step.Replace the
MINIO_KMS_VOLUMEwith the path to the volume or mount point you want MinIO KMS to use for storage.Previous versions of MinIO KMS (prior to RELEASE.2025-11-12T19-14-51Z) require the
MINIO_LICENSEenvironment variable.For license configuration instructions for previous versions, see the Legacy License Installation Guide.
-
Create the MinIO KMS configuration file
Create a file at
/etc/minkms/config.yamlwith the following content:version: v1 tls: certs: - key: /etc/minkms/certs/private.key cert: /etc/minkms/certs/public.crt ca: /etc/minkms/certs/CAsGive the new file to the
minkms-useruser:sudo chown minkms-user:minkms-user /etc/minkms/config.yaml sudo chmod 600 /etc/minkms/config.yamlMinIO KMS reads this file as
minkms-userand does not start if it cannot. A file you create withsudobelongs torootand, under a restrictiveumask, is unreadable by any other account. -
Enable and start the MinIO KMS service
Run the following commands to enable and start the service:
sudo systemctl daemon-reload
sudo systemctl enable minkms
sudo systemctl start minkms
Use the
sudo journalctl -u minkmscommand to validate the status and output of MinIO KMS. The output should include the Node hostname, API Endpoint, and arootor superadmin API Key for use with performing KMS operations.You can also filter the
journalctloutput to only return therootor superadmin API Key:sudo journalctl -u minkms -g "API Key" -o cat --output-fields "MESSAGE"Run this with
sudounless your account is in theadmorsystemd-journalgroup. Without journal access,journalctlprints nothing and still exits successfully, which reads as though no API key was issued rather than as a permissions problem.Store the API key in a secure location, such as a dedicated secrets vault. You can also compute the API Key with the HSM key:
minkms identity hsm:aes256:KEYVALUE -
Verify that MinIO KMS is running
Query the health endpoints to confirm the server is up and able to serve requests:
curl -sk -o /dev/null -w "live: %{http_code}\n" https://127.0.0.1:7373/v1/health/live
curl -sk -o /dev/null -w "ready: %{http_code}\n" https://127.0.0.1:7373/v1/health/ready
Both endpoints answer with an empty body, so the commands print the status code instead:
live: 200
ready: 200
The
liveendpoint reports that the process is running. Thereadyendpoint reports that the server can serve cryptographic requests. Do not continue until both report200.If either check fails, see Troubleshooting.
Connect an AIStor object store to MinIO KMS
Give the object store its own enclave, an admin identity within that enclave, and a default encryption key. Complete the steps in order. Each step produces a value the later steps need.
The commands below run on the MinIO KMS host and connect to 127.0.0.1, so each one carries -k.
A certificate issued for this host’s name does not cover the loopback address, and a self-signed certificate is not trusted at all, so minkms refuses the connection either way.
Drop the -k only when you connect to a name the certificate covers, with a certificate the host already trusts.
-
Authenticate with the admin API key
Use the
rootor superadmin API key from the previous procedure. Written below asADMIN_API_KEY, it authenticates steps 2 through 4.export MINIO_KMS_SERVER=https://127.0.0.1:7373 export MINIO_KMS_API_KEY=ADMIN_API_KEY -
Create an enclave for the object store
An enclave isolates a group of keys and identities from every other enclave. Give the object store one of its own.
minkms add-enclave -k ENCLAVE_NAME -
Create an admin identity within that enclave
The object store uses this identity to manage its own keys.
minkms add-identity -k --enclave ENCLAVE_NAME --adminThe command prints a second API key and its identity. This one is the enclave API key, and it is not the same value as
ADMIN_API_KEY.Record the enclave API key now. The command prints it once at creation. The server never stores it and cannot show it again.
Do not reuse
ADMIN_API_KEYas the object store’s API key. AIStor Object Store logs a warning at startup if the API key it receives hasSysAdminprivileges. -
Create the default server-side encryption key
The object store uses this key to encrypt object data.
minkms add-key -k --enclave ENCLAVE_NAME SSE_KEY_NAME -
Configure the object store
Set the following environment variables in
/etc/default/minioon every AIStor Object Store host. An object store that already exists needs the same variables.Environment Variable Value MINIO_KMS_SERVER The address the object store uses to reach this host, such as https://minkms-1.example.net:7373MINIO_KMS_ENCLAVE The enclave name from step 2 MINIO_KMS_API_KEY The enclave API key from step 3, not the admin API key from step 1 MINIO_KMS_SSE_KEY The encryption key name from step 4 The object store cannot use 127.0.0.1The
127.0.0.1address works only forminkmscommands run on this host.For
MINIO_KMS_SERVER, give the object store a hostname that its own hosts can resolve and that the MinIO KMS TLS certificate covers. The object store authenticates with mutual TLS, so the connection must not pass through a load balancer or ingress that terminates TLS. Use a TCP (Layer 4) load balancer or a passthrough listener instead.
Next steps
Setting the environment variables does not by itself encrypt anything. Restart the object store to apply them, then turn on default bucket encryption.
Server Side Encryption with MinIO KMS covers both steps, along with the mutual TLS requirements the object store places on the network path to MinIO KMS.
To add more MinIO KMS nodes for availability, see Scale MinIO KMS on Linux. For a multi-node install from the start, see Cluster Deployment.